
Create and edit products
On the product page you see and change everything about one product: texts, prices, stock, shipping, photos, attributes, variations and tax. Changes go straight to your WooCommerce shop as soon as you save.
Want to make products from photos, with help from AI? Use the Studio. This page is about the ordinary product form.
Edit a product
Section titled “Edit a product”- Open Products and click the product.
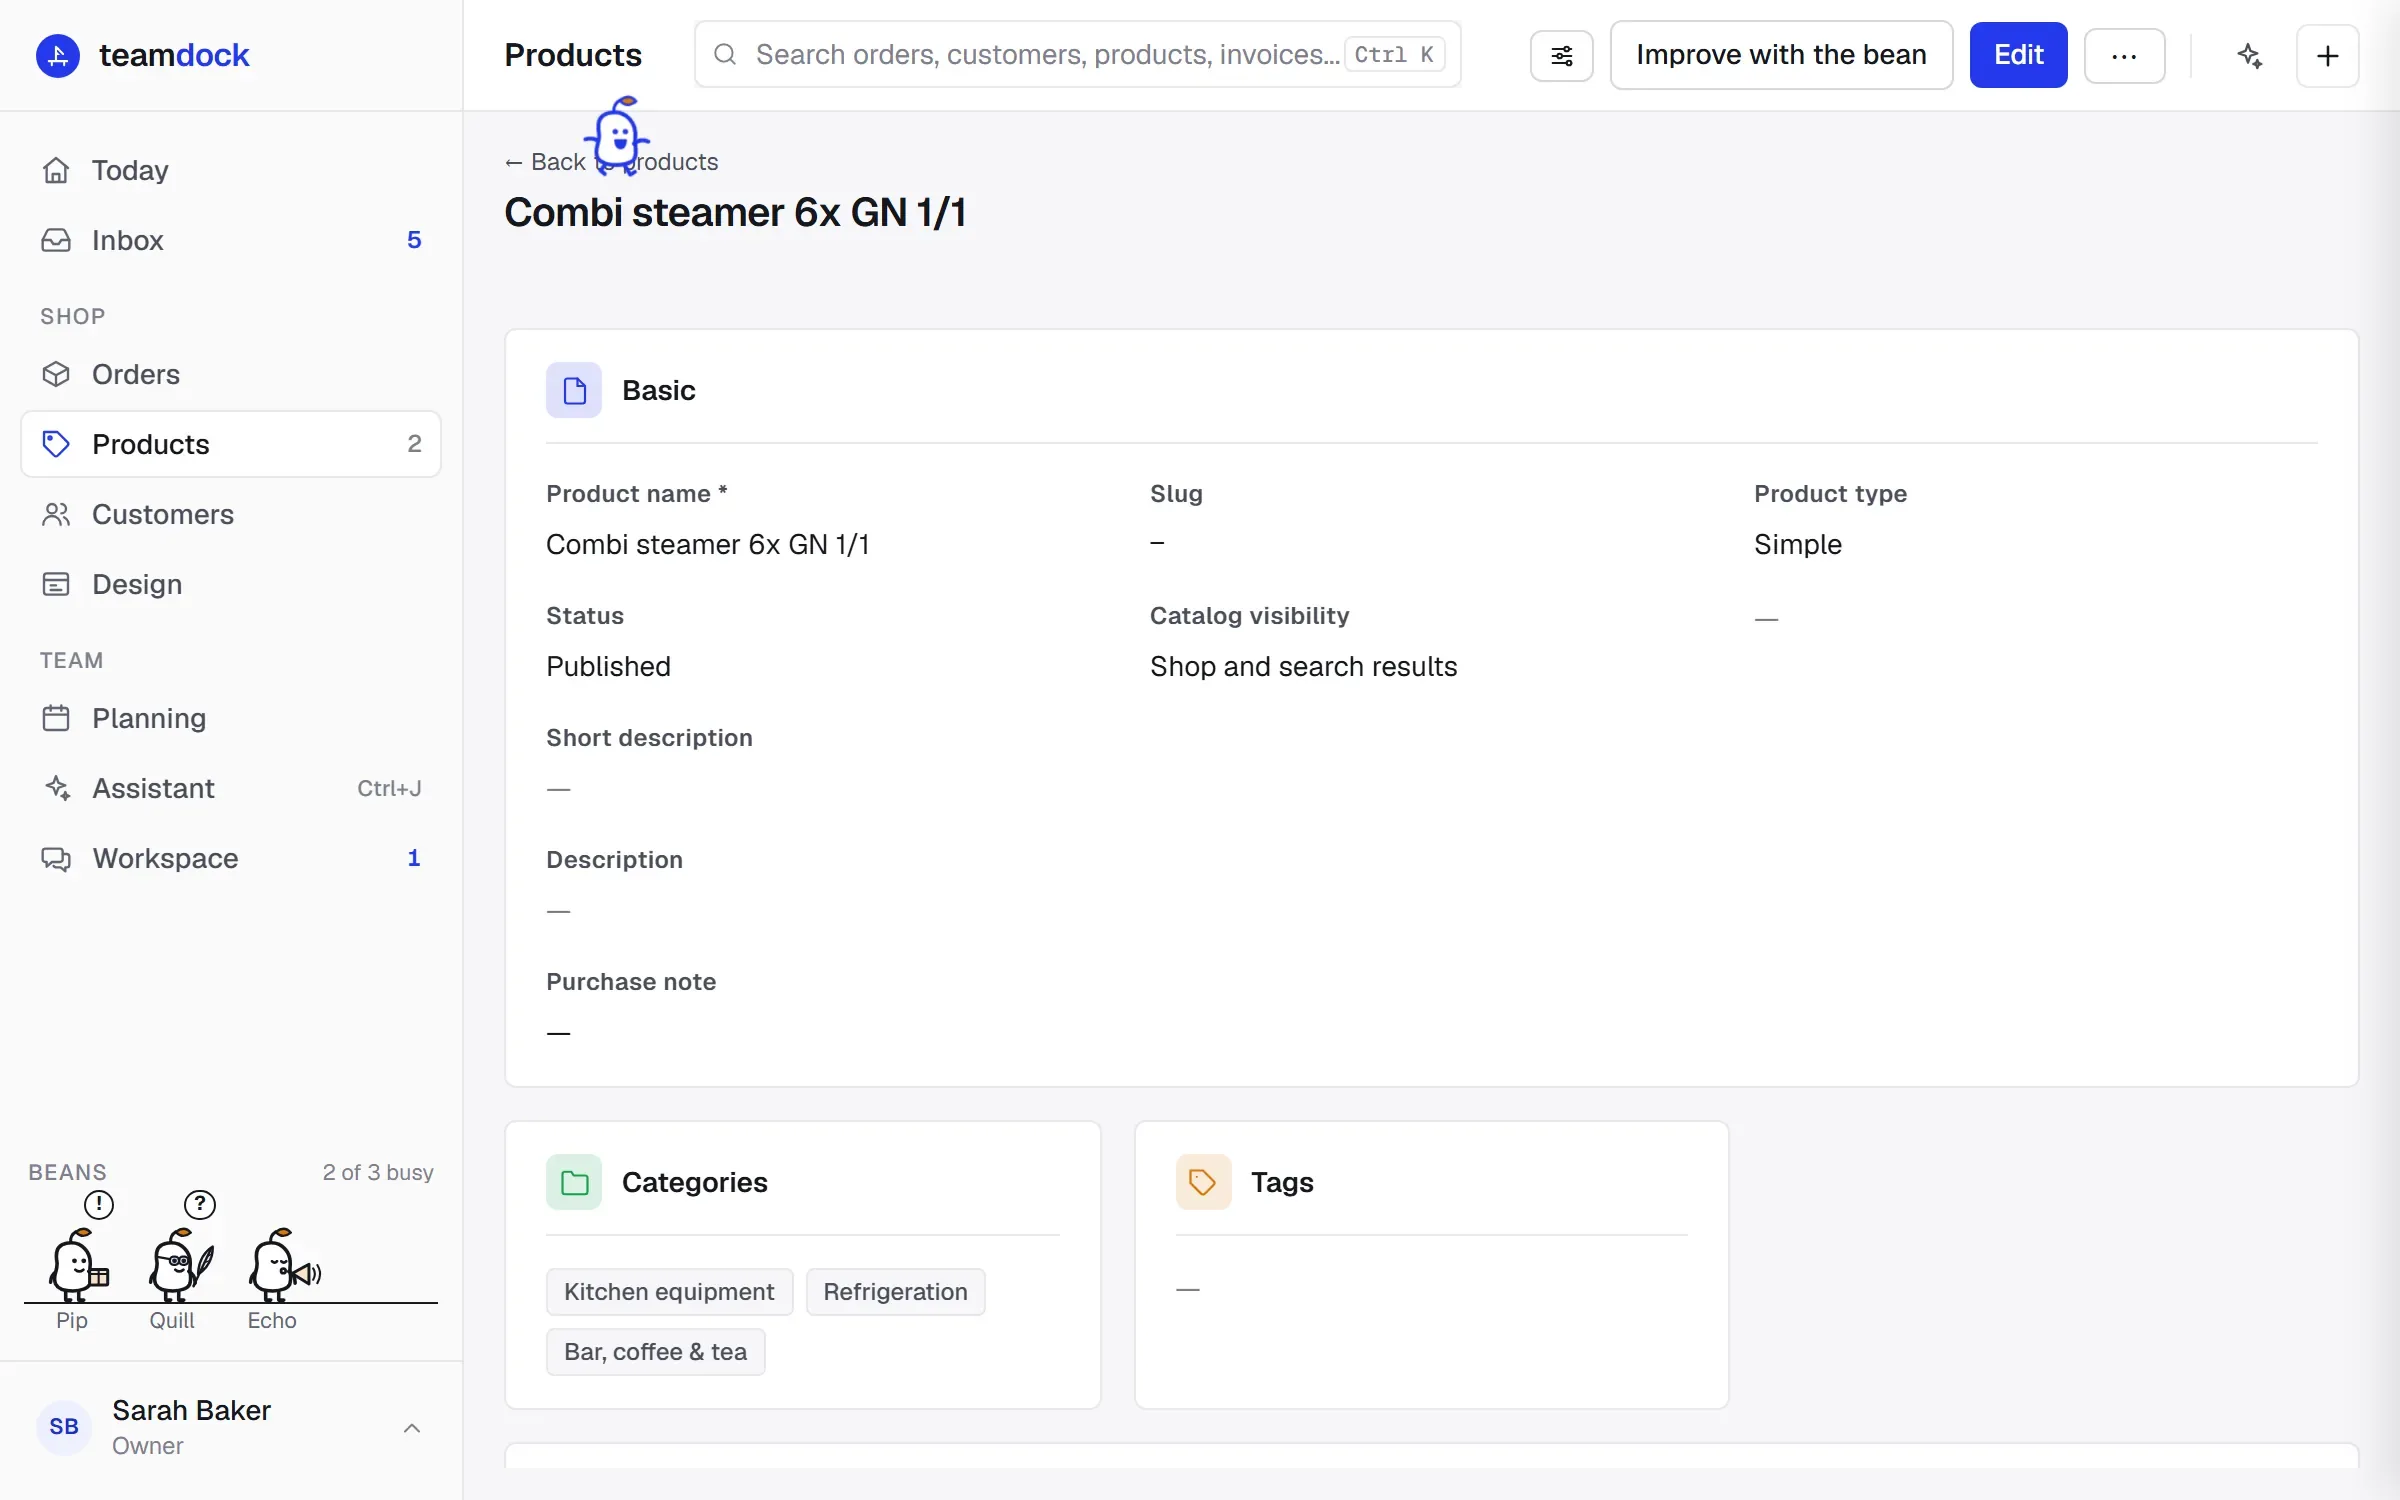
- You first see the read view. Click Edit at the top right.
- Change the fields. The form is split into sections:
- Basic: Product name, Slug, Product type, Status, Catalog visibility, Short description, Description, Categories and Tags.
- Pricing: Regular price, Sale price and the period Sale from / Sale to.
- Inventory: SKU, Manage stock, Stock quantity, Stock status, Allow backorders and Low stock threshold.
- Shipping: Weight (kg), Width (cm), Depth (cm), Height (cm), Shipping class and, if your shop has that field, Delivery cost (website).
- Images: upload, order and hide photos.
- Attributes and Variations: see below.
- Linked: Upsell products and Cross-sell products.
- Tax: Tax status and Tax class.
- Click Save changes. Cancel throws your changes away.
Choosing categories
Section titled “Choosing categories”The category list shows your whole category tree and can be searched: type part of the name to find the right one quickly. What is ticked is shown at the top. If the category does not exist yet, type the name and add it. A new category is created in your shop straight away and ticked at once.
Photos
Section titled “Photos”In the Images section:
- Drag a file onto the box, or click it, to upload.
- Drag the photos into order (on a tablet: hold, then drag). The first photo is the featured image. You can also use Set as featured.
- You can hide a photo: it is then not shown in the shop, but stays in the WordPress media library. Show puts it back at the end of the gallery.
- Removing a photo from the product does not delete the file: it stays in the media library.
- Click a photo to enlarge it. You can also rotate it there. Save (or cancel) your other changes first before you rotate a photo.
Making the form shorter
Section titled “Making the form shorter”If you never use certain sections, click Fields at the top right. Under View choose Compact or Full, or tick what you want to see yourself under Show sections, and click Apply. Sections marked required cannot be switched off.
This choice applies only to you. An administrator can use Also set as the default for everyone to set the choice for the whole workspace. Follow the workspace default takes you back to that default.
Make variations
Section titled “Make variations”A variable product (for example a shirt in three sizes and two colours) is built from attributes:
- Set the Product type to Variable.
- In Attributes, click Add attribute. Fill in an Attribute name and the Values (comma separated), for example
S, M, L. - Tick Used for variations. With Visible on product page the attribute also appears on the product page of your shop.
- In Variations, click Generate all variations. Teamdock creates every combination of the values.
- Give each variation its own Price, Sale price, SKU and Stock qty, and click Save variation for each.
A variation you don’t need is removed with Delete on that variation.
Create a new product by hand
Section titled “Create a new product by hand”- On Products, click + New product.
- Fill in at least the Product name. The rest is optional.
- Want help with the text? Click Generate with AI (see below).
- Check the Status. It is set to Published by default.
- Click Create product. Teamdock then opens the new product.
Generate with AI
Section titled “Generate with AI”The Generate with AI button fills in the description, short description, attributes and tags based on the name you have already entered (plus the SKU, your own description and the category, if you have them).
- Nothing goes to your shop until you click Create product. A suggestion you don’t want is simply typed over, or you leave the page.
- What you have already typed comes first. Attributes and tags are added to, not replaced.
- The AI only picks from categories that already exist in your shop, and only if you have not chosen a category yourself. If none fits, it names a suggestion for a new category in the message, but does not create it.
- Always read the text through: the AI only knows what you filled in.
If AI is not available in your workspace yet, Teamdock says so when you click.
More actions on a product
Section titled “More actions on a product”Through the ⋯ button (More) at the top right of the product page:
- Discuss in workspace: open the product in the team workspace to talk about it with colleagues.
- Print label: send a label for this product to your label printer.
- Duplicate: a copy under a New article number. See below.
- Delete: delete the product. This cannot be undone, and needs Full access.
Duplicate a product
Section titled “Duplicate a product”Useful when a second unit of the same product comes in. The copy gets everything from the original: photos, texts, prices, attributes and variations. The old article number in the texts is replaced by the new one.
- Choose ⋯ → Duplicate.
- Fill in the New article number and change the Name if needed.
- Tick Print a label for the new number if you want a label straight away.
- Click Create draft.
The copy is always a draft, so nothing reaches the shop before someone has looked at it. An EAN/GTIN and the slug are not copied, because they must be unique per product.
Improve with the bean
Section titled “Improve with the bean”If the bean is switched on in your workspace, you can drag it onto a product or click Improve with the bean. You say what needs to be better (for example “too long” or “it is 400 V”) and the bean proposes new texts next to what is there now. Nothing is saved until you take the proposal and save the product. More about the AI assistant: Assistant.