
Studio settings
In the Studio settings you decide once what drafts should look like: in which language and tone the AI writes, how a title is put together, which fields are required and how photos are processed. They apply to everyone in your workspace, for photoshoots and for imports.
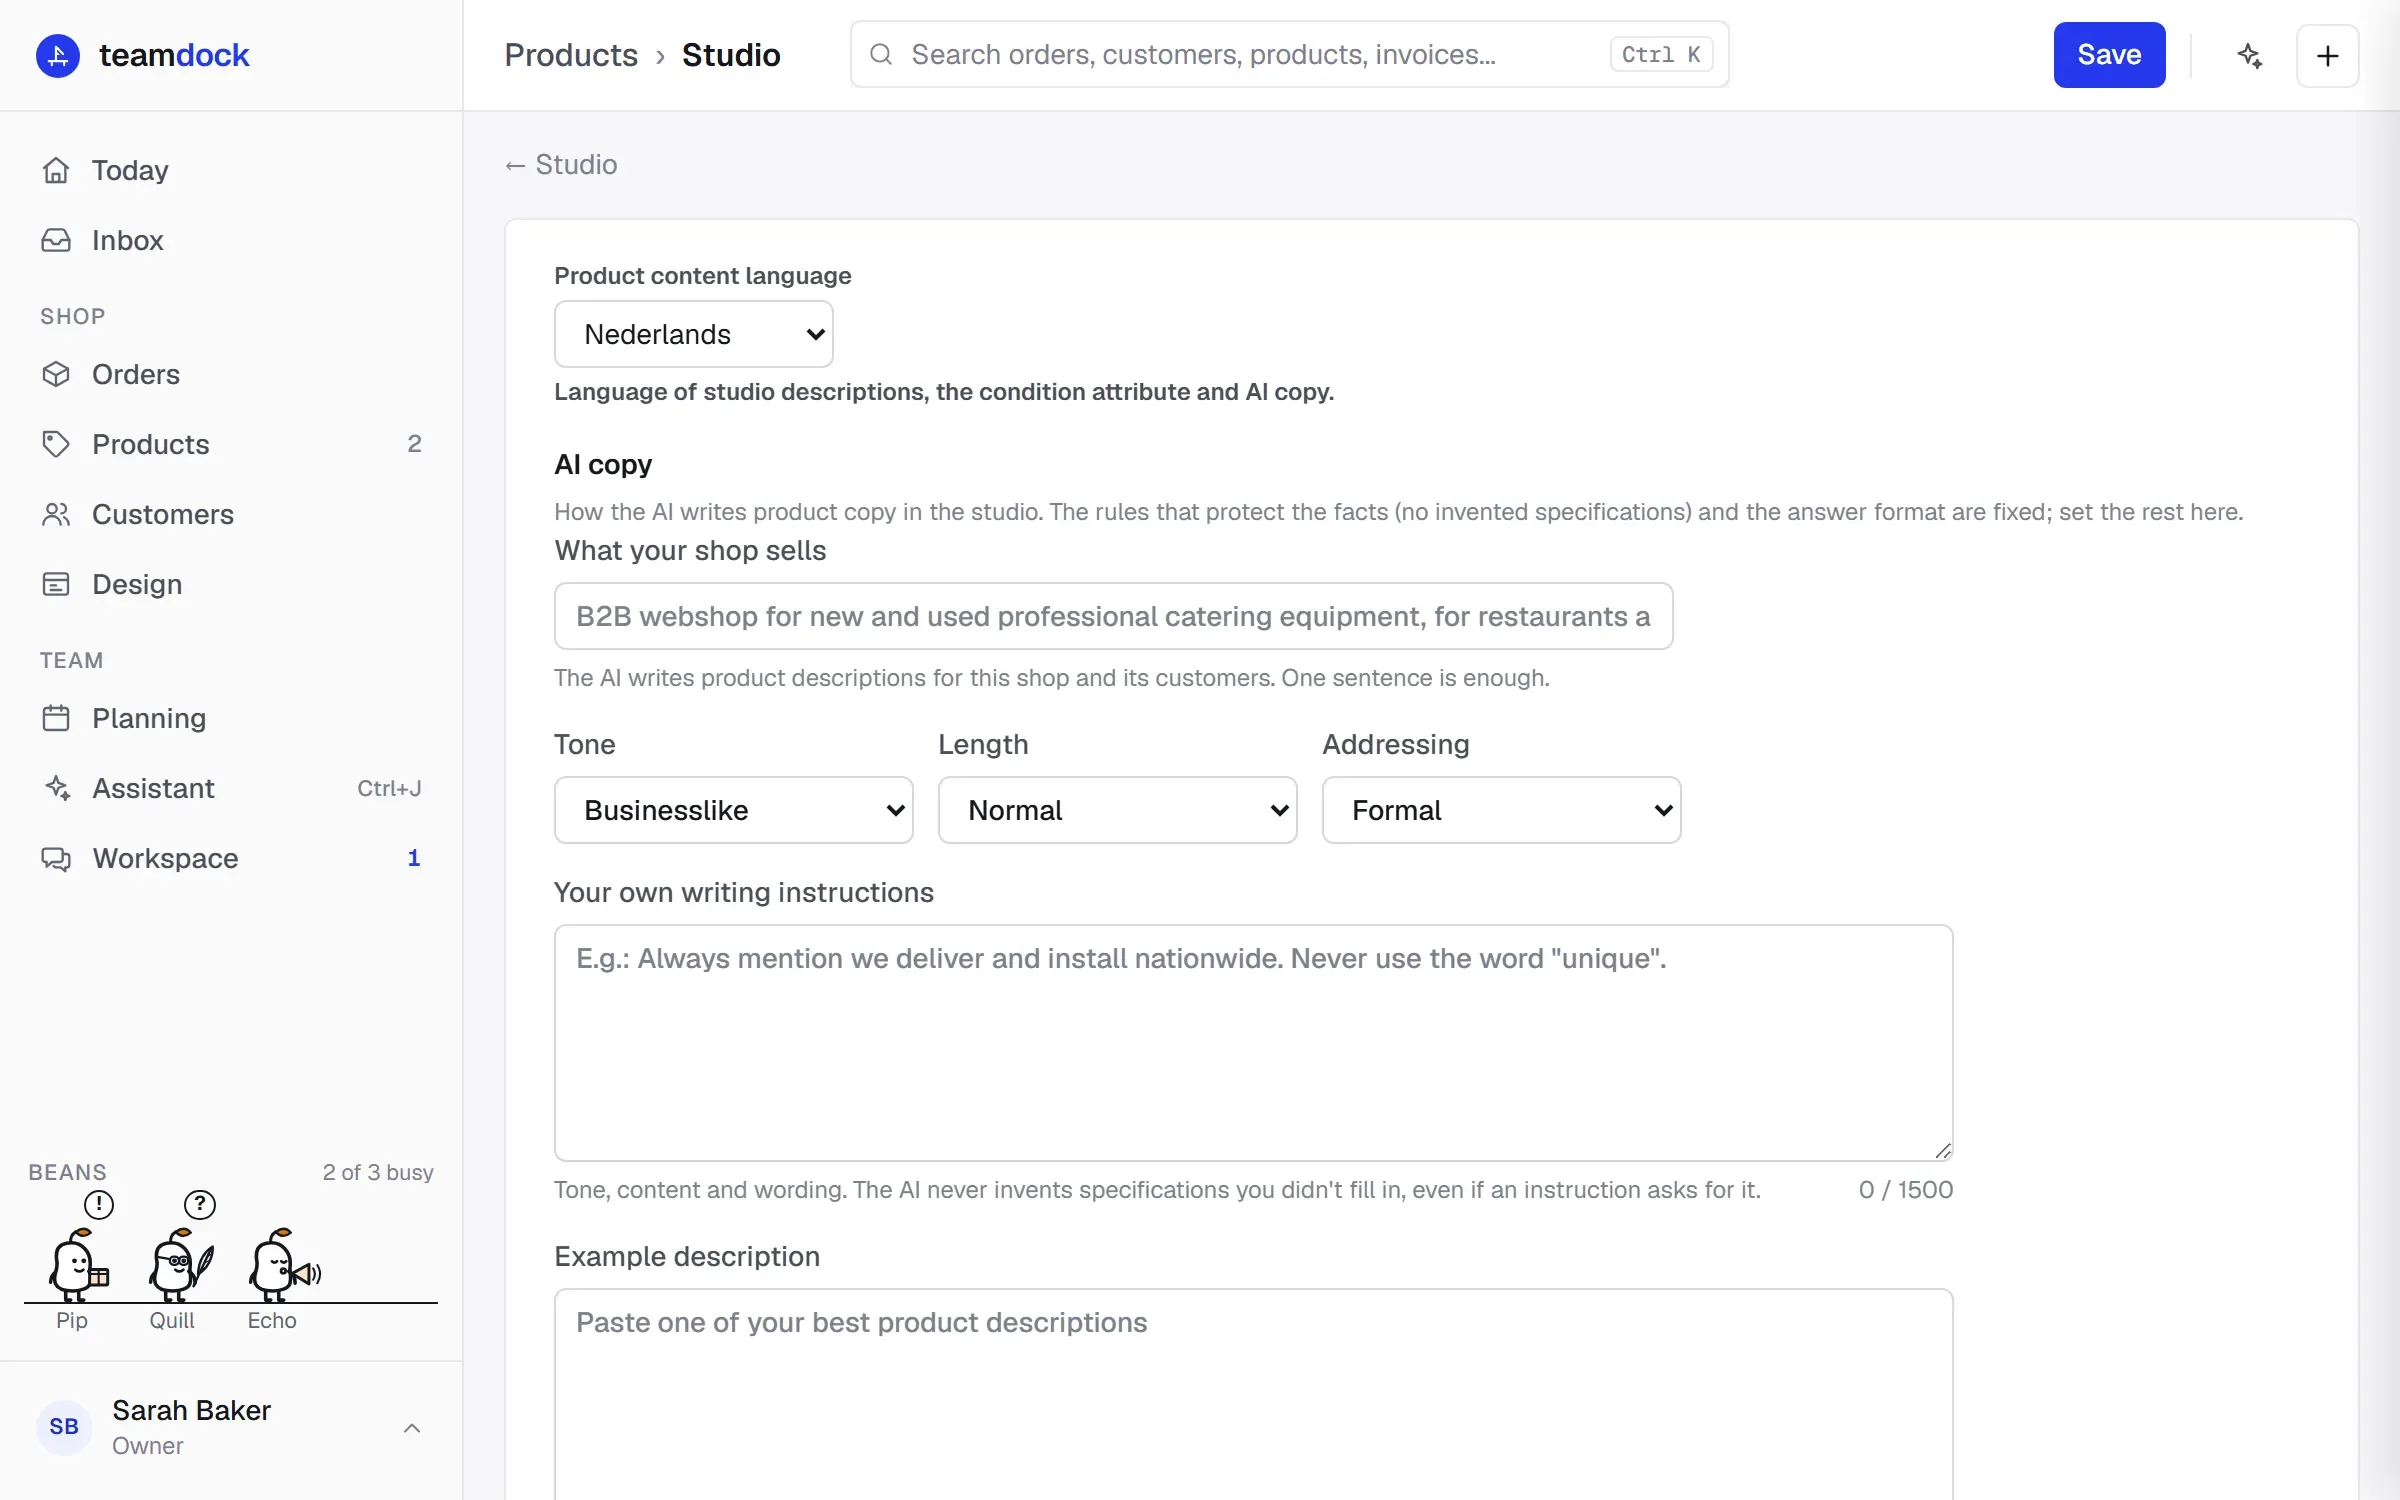
Go to Products → Studio and, under Image settings, click Advanced settings. Only administrators see this link. After making changes, click Save.
Product content language
Section titled “Product content language”Product content language (Nederlands or English) sets the language of the descriptions from the Studio, of the Condition attribute and of the AI copy.
AI copy
Section titled “AI copy”Here you set how the AI writes the product texts. The rules that protect the facts (no invented specifications) and the answer format are fixed; you choose the rest.
- What your shop sells: one sentence about your shop and your customers, for example “B2B webshop for new and used professional catering equipment”. The AI then writes for those customers.
- Example description: paste one of your best product descriptions. The AI matches its tone and way of explaining, but never copies its facts.
- Tone: Businesslike, Friendly or Technical.
- Length: Short, Normal or Extensive.
- Addressing: Formal, Informal or Don’t address the reader.
- Your own writing instructions: for example “Always mention we deliver and install nationwide” or “Never use the word unique”. The AI never invents specifications you did not fill in, even if an instruction asks for it.
Show the full instructions shows exactly what the AI receives: the fixed rules first, your settings at the end. Each product adds the fields from its card.
Test before you save
Section titled “Test before you save”- Go to Test on a draft and pick an existing Studio draft under Choose a draft.
- Click Test.
- You see the Current copy next to the copy With these settings.
- Happy with it? Click Save. New drafts then use your settings, and so does Retry AI on an existing draft.
Nothing is saved while testing, not even in the draft.
Learning from your own edits
Section titled “Learning from your own edits”Teamdock keeps the text as the AI wrote it and compares it with what you end up publishing. You see how many texts were published unchanged, how many were edited and how many have not been published yet.
- When there are enough edited texts (Teamdock tells you when), click Analyse edits. This costs one AI call.
- If the AI sees a change that keeps coming back, you get a writing rule under Proposals, with how many products it saw it in.
- Click Approve or Reject on each proposal.
Approved rules are listed under Active writing rules and apply to every new text. Remove takes a rule away again. A rule is never added automatically: it only applies once someone approves it.
Required fields
Section titled “Required fields”Tick the fields that must be filled in before a Studio product can become a draft, for example SKU, category or dimensions. You can also make your shop’s attributes required. If a card is missing a required field, that field turns red and nothing is made until it is filled in.
The typed title field counts, not the composed title.
Condition and warranty
Section titled “Condition and warranty”Under Condition & warranty you give each condition (New in box, New without box, Used, Refurbished) its own Label and a Default warranty. The label becomes the product’s Condition attribute, which customers can filter on in the shop. The warranty is the default on the card and goes into the description. If you leave a field empty, the default value shown in grey applies.
The title
Section titled “The title”- Default extra title words: words filled in as Other on every new product, for example “Horeca”. Can still be changed per product.
- Title order: drag the parts (the typed title, your attributes, dimensions, extra words) into the order in which the product name is put together, or use the arrows. Parts without a value are skipped. Below the list you see an example. Reset to default takes you back.
- Attributes in the studio: ticked attributes of your shop appear as fields in the photoshoot and the import. Untick attributes that belong to an integration rather than to the product.
Photos
Section titled “Photos”Under Image compression:
- Max dimension: the longest side of every photo is scaled down to this. Recommended: 2048 px.
- JPEG quality: higher looks better, but gives larger files. Recommended: 85%.
- Image format: Auto (WebP where supported), WebP or JPEG. WebP is about 30% smaller. Auto falls back to JPEG on devices that cannot make WebP.
- Shot labels: what the photo slots are called. Named angles (Front, 45°, Side, Back, Top, Detail) gives a fixed order. Numbered suits products whose angles vary. Off hides all angle guidance on the phone.
Under Watermark:
- Tick Enable watermark on shoot photos.
- Choose a Watermark logo. A PNG with a transparent background works best.
- Choose the Position and Opacity.
Photos are scaled down and watermarked on the device that takes or uploads them, before they go to your shop. The three main photo settings (watermark, JPEG quality, max size) can also be changed quickly on the Studio page itself.