
Website design
With Website design you give your shop a new look without building it yourself in WordPress. You choose colours, fonts, a header and footer, and put your home page together from sections. You see everything first in a preview of your real shop. Visitors keep seeing the current design until you publish.
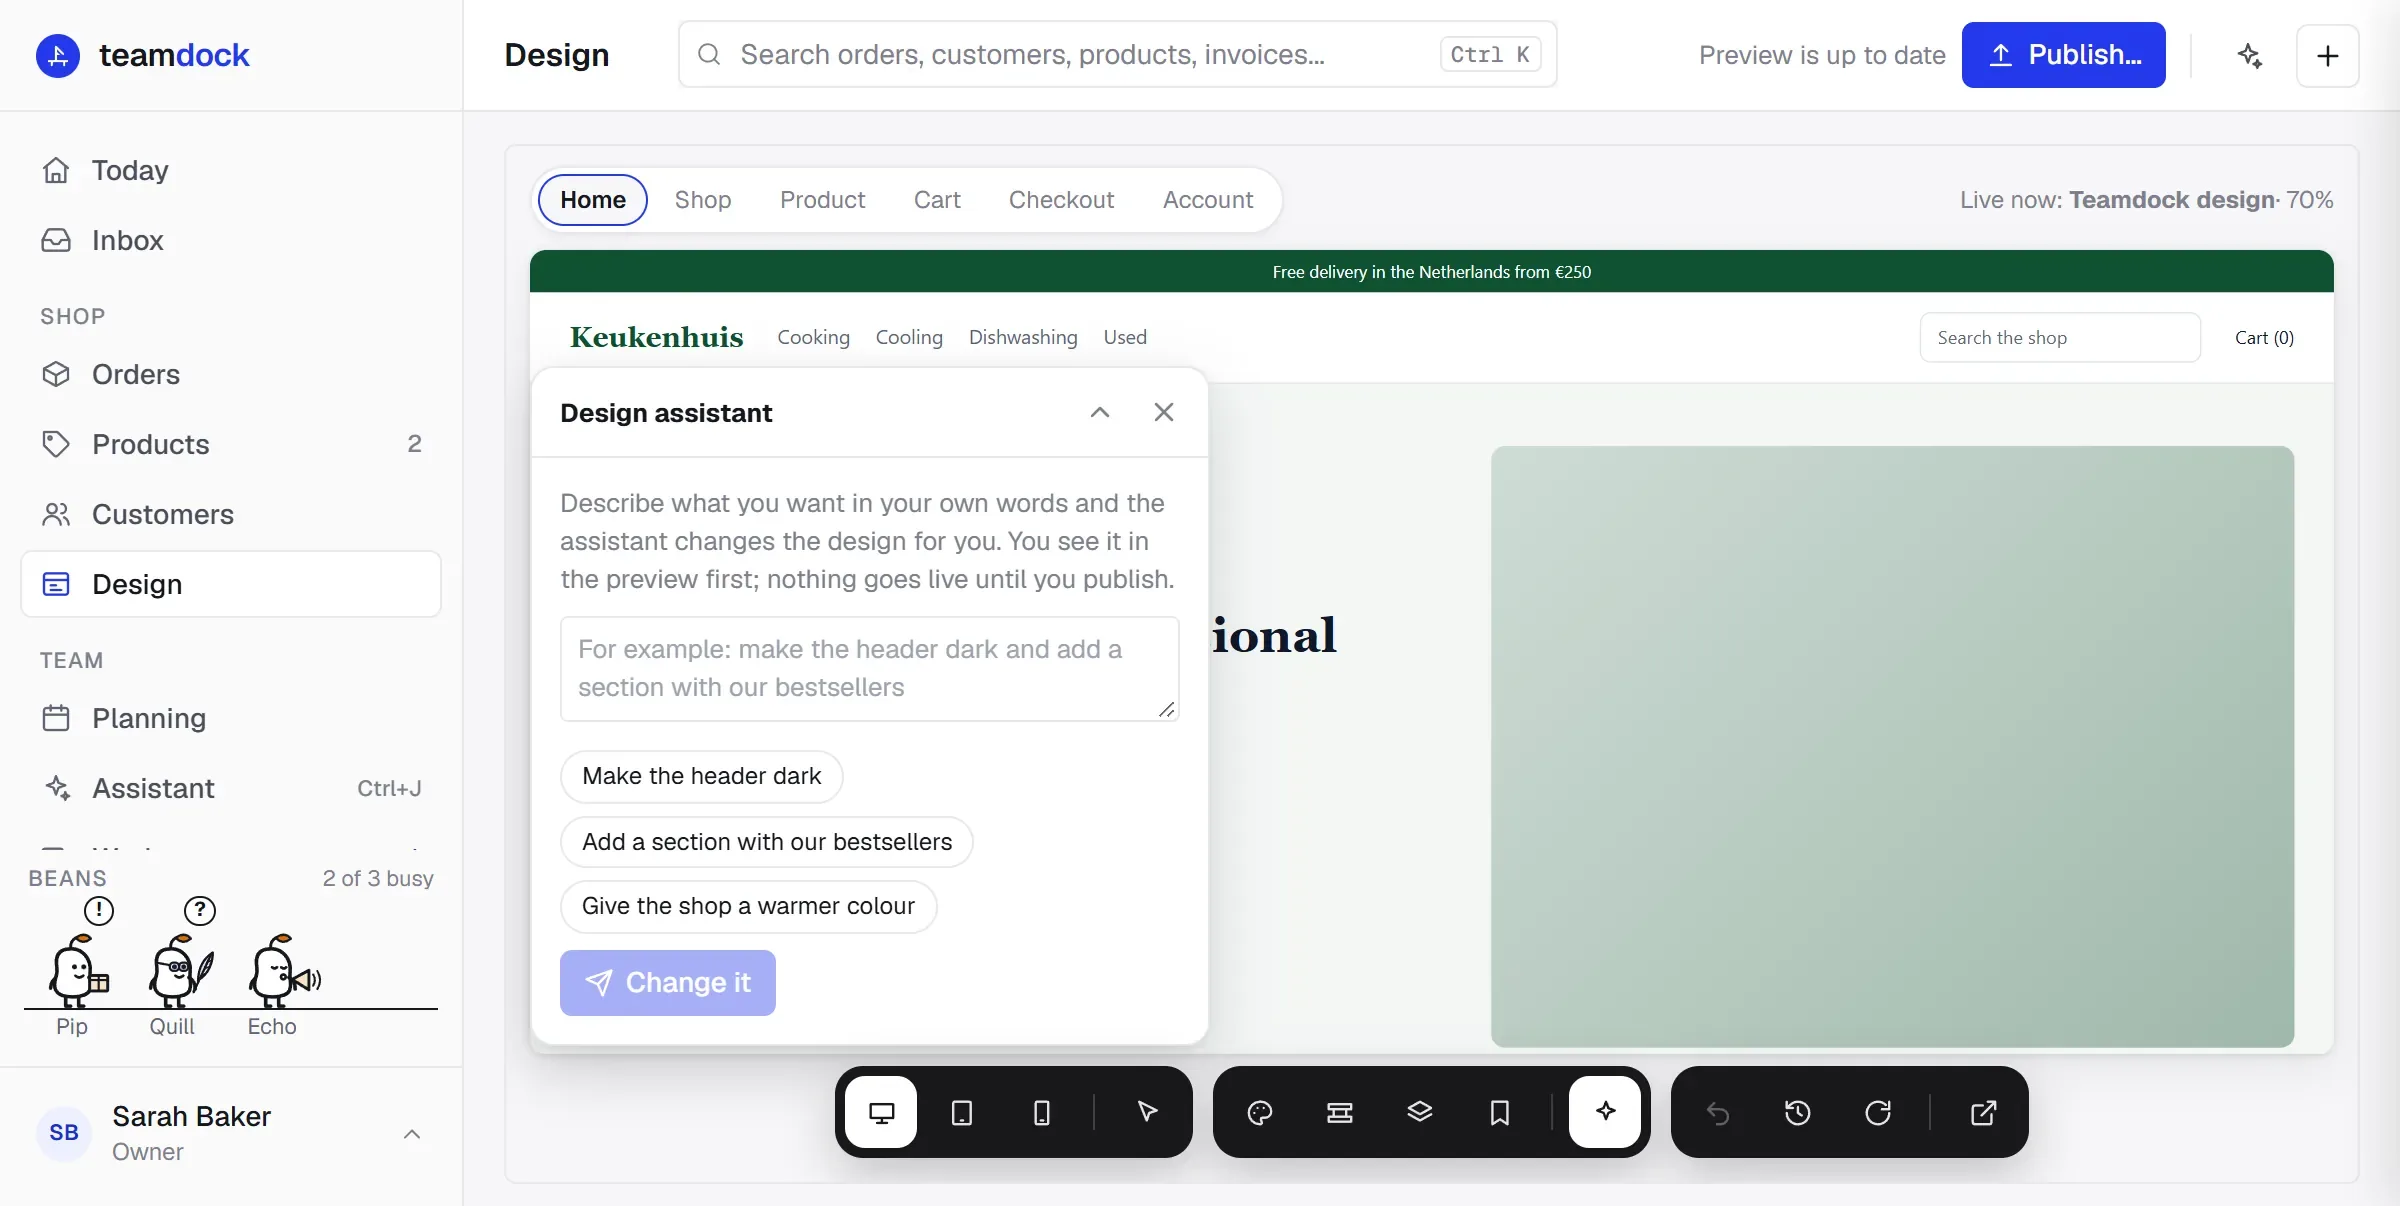
You find it in the menu on the left, in the Shop block, as Design. Only administrators see this menu item.
What you need
Section titled “What you need”- A connected WooCommerce shop. See Connect your WooCommerce shop.
- The Teamdock Designer plugin in your shop. A shop hosted by Teamdock already has it. If your shop has its own hosting, Design tells you to install the plugin, with the button Download the plugin (.zip). You also find it under Settings → Integrations as Website designer. See Teamdock WordPress plugins.
Starting from a description
Section titled “Starting from a description”The first time, Teamdock asks you to describe your shop.
-
Under Describe your shop, say in a few sentences what you sell, to whom, and how your shop should feel.
-
Optional: under Sites you like (optional), enter up to three addresses, or add a Screenshot. The designs then follow the style of those sites (colours, type, corners, order). No text, picture or logo is taken from them.
-
Click Make three designs. This takes up to a minute, or up to two minutes if you named sites.
-
Pick one with Use this design, or click Show three others.
Choosing a design changes nothing for visitors yet. It becomes your draft, which you can keep changing. To start again later, choose Start again from a description (under More).
Changing the design
Section titled “Changing the design”The preview of your shop is in the middle. The toolbar around it opens the panels and tools:
- Style: colours, fonts, buttons, corners, cards and transitions. Under Looks, one click changes everything at once; your texts, pictures and sections stay as they are. Surprise me picks a random look. If you have a logo, Colours from my logo takes a palette from it.
- Header and footer: your logo, the header (layout, search box, menu, a line above the header) and the footer (about your shop, contact, opening times, extra columns of links, a newsletter sign-up form).
- Sections: the sections of the page you are looking at. Use Add a section for, for example, an Opening, Products, categories, questions, customer quotes or a Free layout with your own rows and columns. You can move and remove sections and give them a Background of its own (an Own colour or a Photo as background). Starting from an empty home page? Start with a suggested home page helps.
- Library: keep a design under a name with Save as… to come back to it or compare, and keep single sections with Keep section to use them on another page.
- Section: then click a section in the preview to change only that one.
- Write: edit text directly in the preview and drag sections.
- Screen size: view the preview as a desktop, tablet or phone.
Above the preview you choose which Page you are looking at: Home, Shop, Product, Cart, Checkout or Account. Those pages can have sections of their own too, shown under the page’s own content and above the footer. Your shop’s own pages (such as “About us”) follow the design; you edit their text in WordPress via Edit the text in WordPress.
Pictures
Section titled “Pictures”For a picture, choose from My pictures (your shop’s media library), upload one with Upload a picture, or search free-to-use photos under Stock photos. Fill empty pictures with my products puts photos of your best-selling products and categories in empty places.
The design assistant
Section titled “The design assistant”Open Assistant and describe in your own words what you want, for example “make the header dark and add a section with our bestsellers”. Click Change it. If you selected a section, the assistant changes only that one.
If the assistant proposes a new page, such as a contact page, you can make it with Make this page or skip it with No thanks. A page you make is published at once. If it ends with a request form, what visitors send arrives as a ticket in your Inbox.
Under Which AI model answers you choose Mistral (processed in the EU) or, if an administrator switched it on under Settings → AI, Claude (processed outside the EU).
Previewing and publishing
Section titled “Previewing and publishing”The preview updates itself while you work. At the top right you see Changes… and then Preview is up to date. If it says Preview not updated., click Try again.
The preview is your real shop with the new design. Only you see it, and no orders can be placed from it. With Preview (Open in a new tab) you walk through your shop in a tab of its own.
-
Click Publish… at the top right. The button only works once the preview is up to date.
-
Confirm that you want to replace the current theme with this design for all visitors.
-
You see the message that your shop now has the new design.
The previous design is kept. With Previous design (Put the previous design back) you put it back for all visitors. If your shop does not load with the new design, Teamdock puts the previous design back by itself and nothing changes for visitors.
Undo reverses your last change to the draft.
- Told that a button in your design goes to a page your shop does not have? Click Make this page, or change the button’s link.
- Seeing the message that buyers cannot pay without making an account? Allow guest checkout under WooCommerce → Settings → Accounts & Privacy.
- If Design says your shop has an older version of the designer plugin, download the new one and upload it in WordPress the same way.
Other messages, such as “Your host blocks theme changes”, are in Connection problems.