
Photoshoot
In a photoshoot your phone temporarily becomes a camera for Teamdock. Every photo you take appears on the computer within a few seconds. There you sort the photos by product, fill in the details and turn them all into drafts in one go.
You need a computer (or tablet) for the sorting and a phone with a camera. The phone does not need to be logged in to Teamdock.
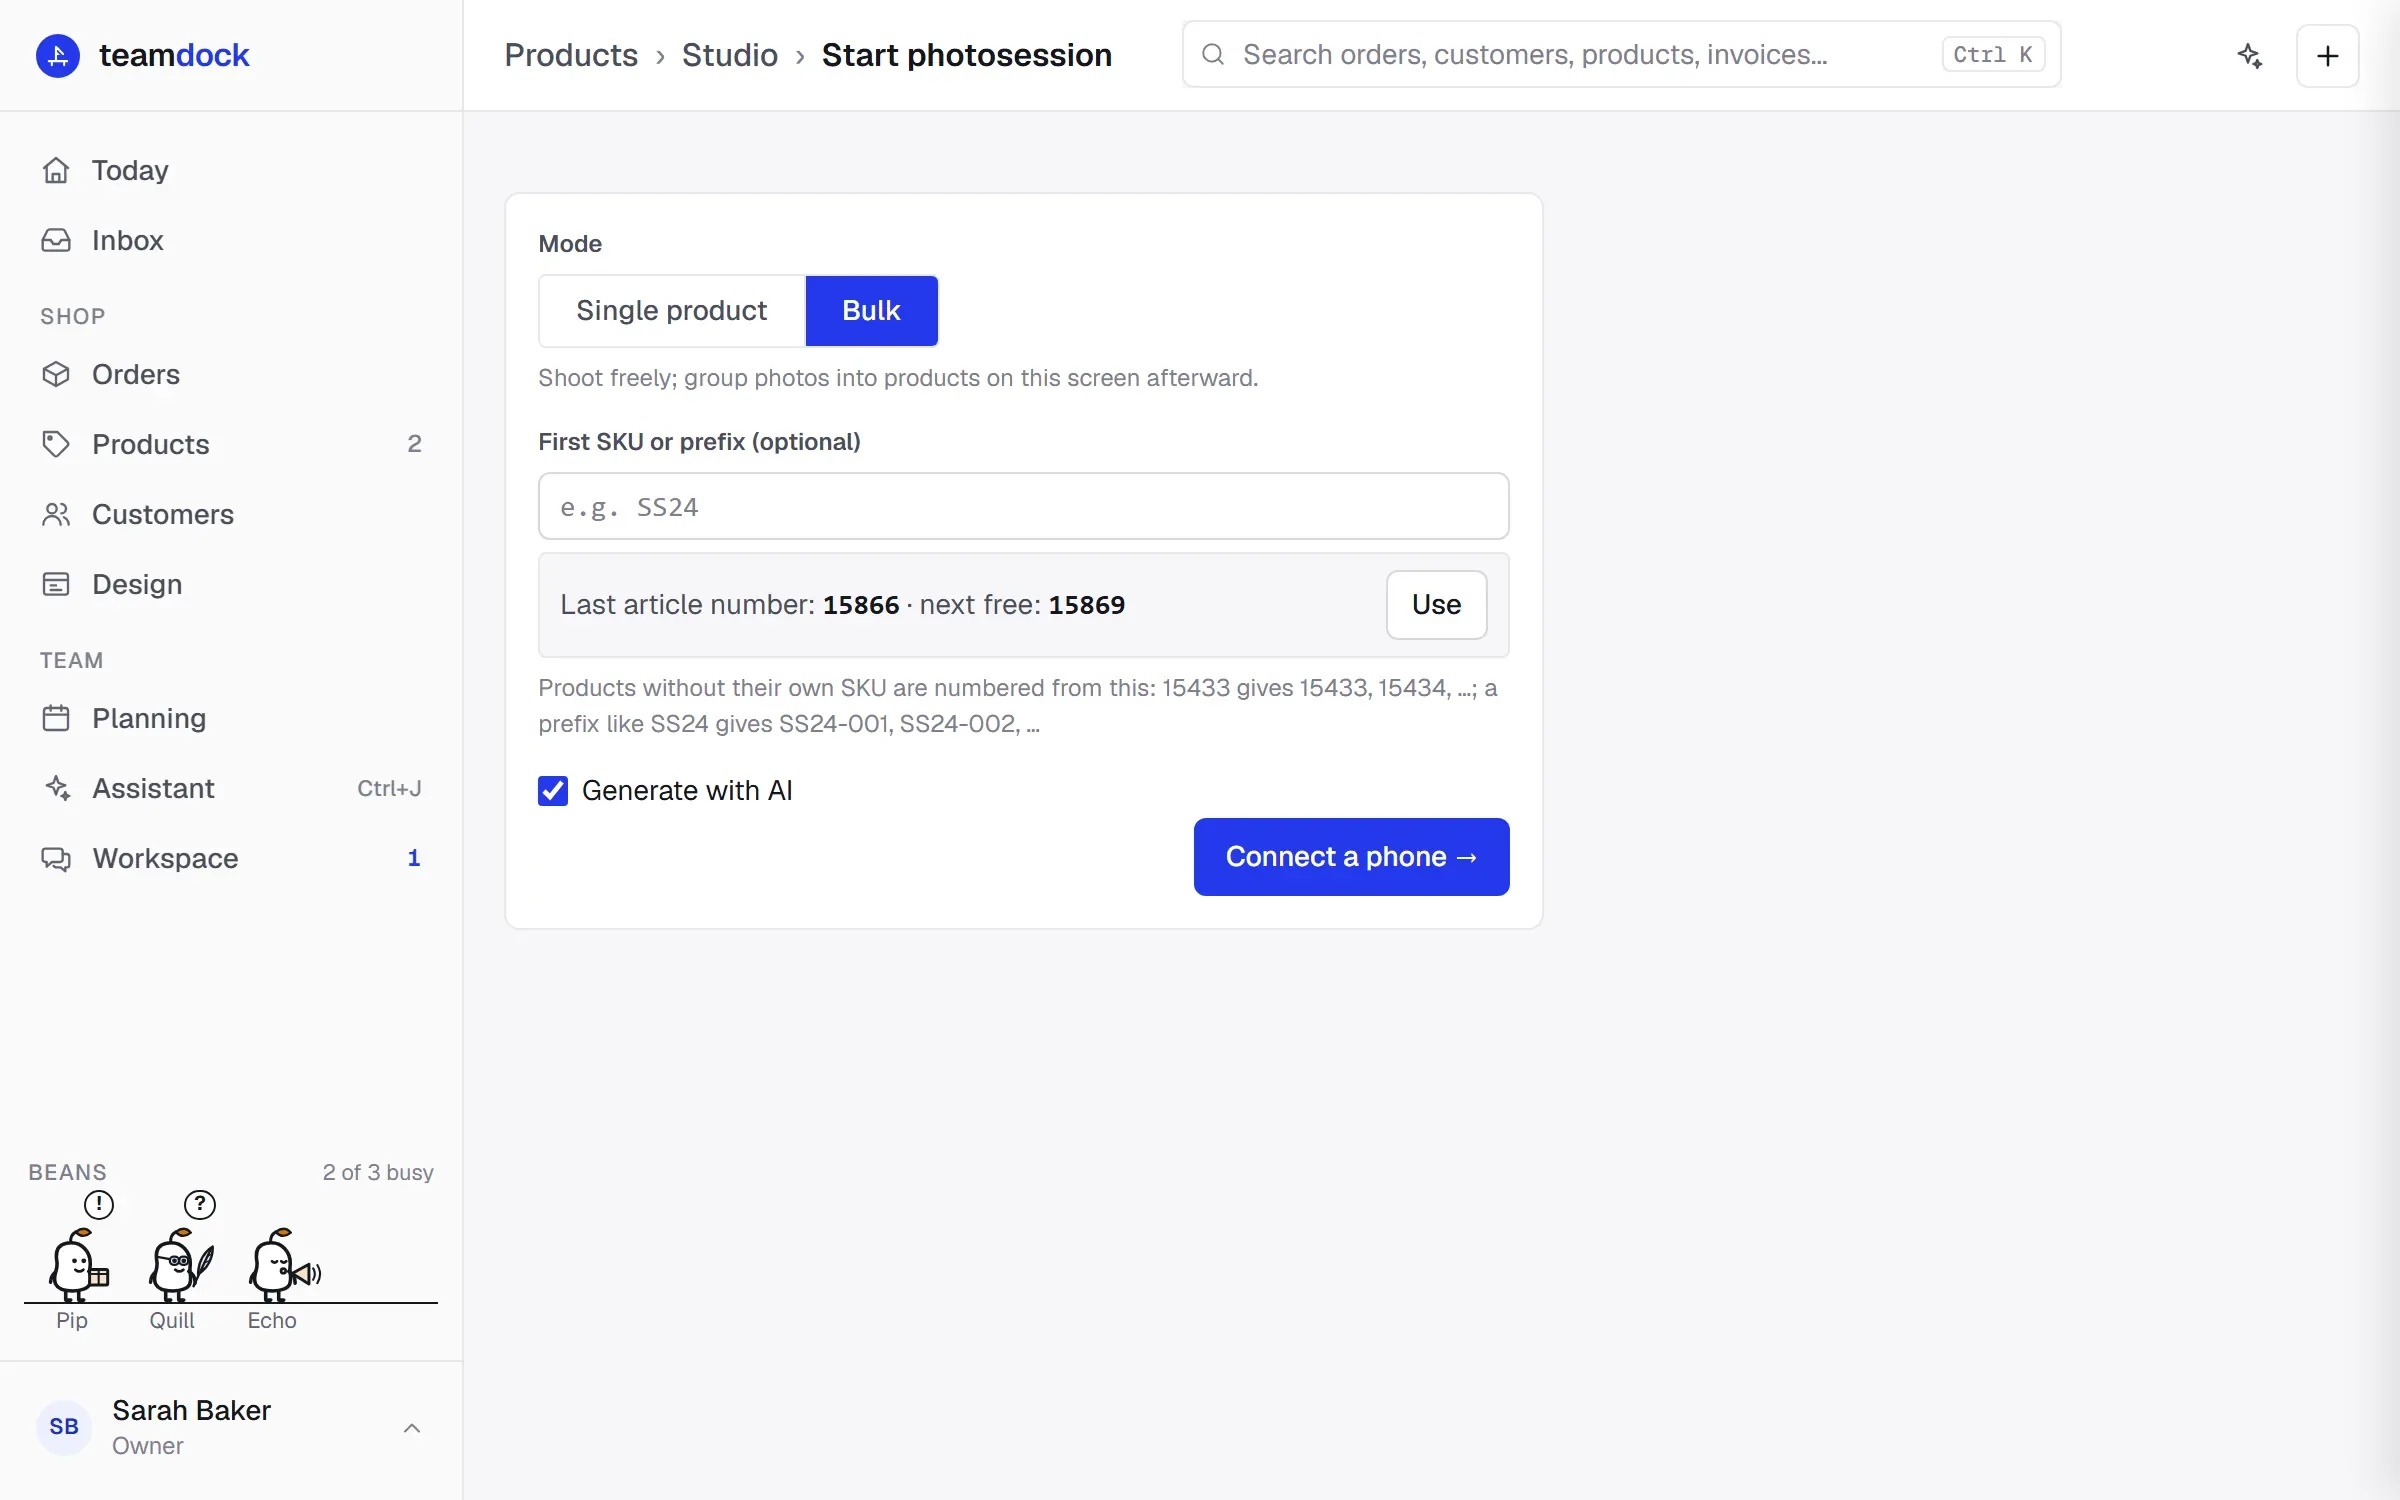
1. Start the session on the computer
Section titled “1. Start the session on the computer”- Go to Products → Studio and click Start photoshoot.
- Choose the Mode:
- Bulk (default): shoot freely, several products in a row. On the phone you tap Next for each new product.
- Single product: all photos belong to one product.
- Optionally fill in First SKU or prefix (optional) with where the numbering should start. Products without their own SKU are numbered from this:
15433gives 15433, 15434, …; a prefix likeSS24gives SS24-001, SS24-002, … - Leave Generate with AI on if you want the AI to write the text (see what the AI does and does not do).
- Click Connect a phone →.
2. Connect the phone
Section titled “2. Connect the phone”There are three ways:
- Scan the QR code. Open your phone’s camera and scan the code on the screen. The phone opens a camera page in the browser. You can also copy the link with Copy link and open it on the phone yourself.
- The Teamdock app. In the app on your phone, open Studio → Camera for a photoshoot and tap Use as camera on the session.
- A notification. On the computer, click Send to my phone. You get a notification on every phone where you have turned on notifications in the Teamdock app; tap it and the camera opens. If nothing arrives, turn on notifications in the app under Settings → Notifications.
As soon as the phone is connected, the computer shows Phone connected.
3. Shoot with the phone
Section titled “3. Shoot with the phone”- Tap Tap to start the camera and allow camera access.
- At the top you see which product you are on (Product 1) and how many photos it has.
- Tap the shutter button to take a photo. You can take the next one straight away: sending happens in the background.
- Done with this product? Tap Next. The next product starts.
- Forgot a photo? Tap the arrow at the top left to go back to the previous product and take another.
Handy tools, through the button at the top right (Camera tools):
- Grid: guide lines to get your product straight in the frame.
- Level: a line that shows whether you are holding the phone straight. On an iPhone, Safari needs access to motion and orientation.
- Previous shot as a guide: a faint copy of the same angle from the previous product, so all your product photos look alike.
- Auto capture: takes a photo as soon as the phone is still.
Use 1× and 2×, or pinch with two fingers, to zoom. If a photo is blurry, too dark or overexposed, you see a short warning.
Saving battery. The camera switches off after 5 minutes without a photo, or as soon as you lock the phone or open another app. Tap the screen to carry on. After 60 minutes without photos the link is paused. Then click Reconnect phone on the computer and tap Try again on the phone.
4. Sort and fill in on the computer
Section titled “4. Sort and fill in on the computer”Under Products a card appears for each product with its photos. Click Editing photos for an explanation of the buttons. Point at a photo to see them:
- Order: drag the photos, or use the arrows on the sides. The first photo is the main photo.
- Star (Set as main image): makes this photo the main photo.
- Cross (Drop from gallery): don’t use this photo.
- Eye (hide): the photo is uploaded, but not shown in the shop.
- Scissors (New product from here): this photo and all following ones become a new product. Useful when someone forgot to tap Next on the phone.
- Wrong product? Drag the photo onto another card, or onto the + box for a new product.
A product can have at most 20 published photos. Click a photo to view it large; you can also rotate it there.
Then fill in the details on each card: SKU (empty is numbered automatically, you can also scan), Title, Category, Width, Depth, Height and Shipping class. More details ▾ shows the rest: your shop’s attributes (such as Brand and Model), Condition, Warranty, Stock, Weight, Price, Stackable, Features & notes and Other (extra words for the title).
- In Category, type to search. Teamdock suggests categories and a shipping class based on similar products in your shop.
- In Features & notes, write what is special about the product. With AI, the description is made from it; without AI, the text becomes the introduction of the description.
- If you filled in a brand and model, you can look up specifications, if that feature is available in your workspace.
Teamdock saves everything as you work (All changes saved). If you refresh the page, or open the session on another device through Recent sessions, you lose nothing.
5. Create drafts
Section titled “5. Create drafts”- Check that Generate with AI is on or off as you want.
- Click Create … drafts at the bottom.
- If a product is missing required fields, they are shown in red and nothing is made yet. Fill them in and click again. Which fields are required is set by an administrator in Studio settings.
- Teamdock makes the drafts one by one. This runs on the server: you can close the page, or carry on straight away with Start a new photoshoot.
- Done? You see for each product whether it worked. Click Review drafts to check them.
The photos are given the SKU as their file name: the main photo SKU.0, then SKU.1, SKU.2, …; hidden photos become SKU.21, SKU.22, … If the SKU already exists in your shop, that product is not made and the summary says so.
If creating was interrupted, click Create the remaining products. Only the products that don’t have a draft yet are sent again.
Troubleshooting
Section titled “Troubleshooting”| What you see | What to do |
|---|---|
| Phone link expired | The phone cannot send anything more, but your photos are still there. Finish the cards and create the drafts, or start a new session. |
| No pairing code in this browser | The QR code only lives in the browser where the session was started. Click Make a new pairing code and scan it. |
| On the phone: This photoshoot link is invalid or has ended | The session has been finished or deleted, or the link has already been used by another phone. Make a new pairing code. |
| Camera access denied or not available | Give the browser camera access in your phone’s settings and reload the page. |
| AI failed on a product | The draft was still made. Click Retry AI. |